Rumored Buzz on Google Tag Manager Configuration
Table of ContentsThe Greatest Guide To Google Tag Manager ConfigurationHow Google Tag Manager Configuration can Save You Time, Stress, and Money.Our Google Tag Manager Configuration IdeasNot known Factual Statements About Google Tag Manager Configuration Not known Details About Google Tag Manager Configuration Rumored Buzz on Google Tag Manager Configuration
Yay! You've concerned the most effective component of the whole production procedure. All the job that you did to create the tags is involving fulfillment. To launch, click on the blue button in the right-hand corner that says Submit. On the following display, you'll see the option to develop a new version for these adjustments.
The very first 4 are failsafe attributes that will help you prevent and recoup from any type of errors you may make within Google Tag Supervisor. These 4 failsafe attributes can assist you avoid and also recoup from any mistakes you may make within Google Tag Supervisor. Work spaces, Previews, Variations, Third-Party Tags If you have numerous individuals operating in GTM, Workspaces makes it very easy to work with something without also touching what other customers are dealing with. google tag manager configuration.

The Buzz on Google Tag Manager Configuration
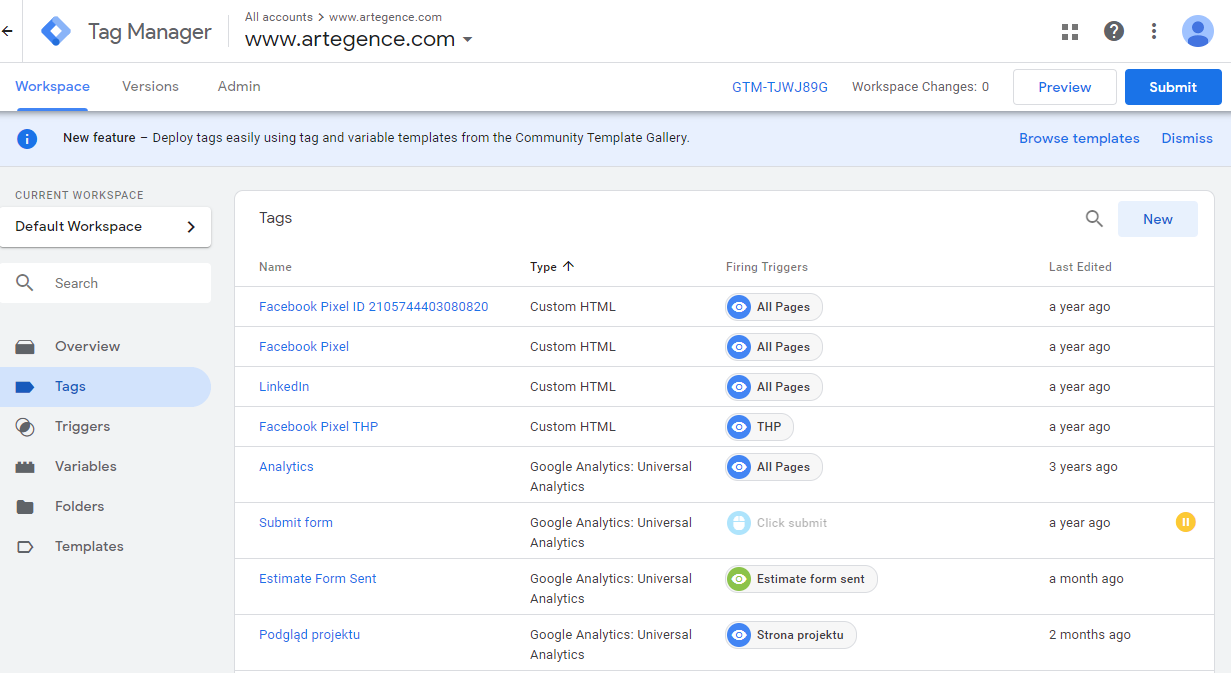
You can see that there are particular tags that are fired and ones that aren't. From there, you can determine what's functioning and also what's not prior to you publish your new tags.
You can simply republish among the previous variations of GTM.When you go to the Versions area of GTM, you'll be able to see when the last variation was created as well as released, by who and also the Version items such as tags, causes, as well as variables. You'll additionally see the version adjustments that were made there.
If you do not want your tag to fire on all pages, you'll specify the web pages here. The very first dropdown has a number of variables to select from.
The 3rd field is where we specify the URL.In this situation, the URL will certainly consist of/ thank-you. Event monitoring is an area where GTM can actually radiate. Prior to GTM, if you intended to track events such as button clicks and also video clip plays, you would certainly have a developer add the tracking code for every.
Not known Details About Google Tag Manager Configuration
Event monitoring is incredibly remarkable. If indeed, event monitoring is going to be your brand-new BFF.Set your Built-In Variables.
This makes it easy when you begin creating even more tags and causes down the line. Do you ever wonder if all that material you created is really obtaining eyeballs on it specifically below the fold?
To get begun on this, produce a trigger and also name it something like DOM Ready, which just means that the scroll deepness tag will certainly terminate when the DOM is all set - google tag manager configuration. DOM stands for Record Things Design.
Once this trigger is developed, move on to developing your tag. Choose Custom-made HTML in the Custom-made area of the tag types.
Little Known Facts About Google Tag Manager Configuration.
For each of the variables, you'll develop an Information Layer Variable in the Page Variable Types. Here's the starting page for creating the next 4 variables. The 4 variables will look like the screenshots below: occasion, Category variableevent, Action variableevent, Tag variableevent, Value variable Once your variables are created, you'll want to send out that tracking information to the data layer.
Name your tag and also pick Occasion as the Track Type. Include the variables that you simply produced to the types below. The four variables that you created are added into the monitoring criteria. If you have actually the area labelled "Non-Interaction Hit" established to "Real," these events will not influence the website's bounce price.
The trigger kind that you'll choose is the Custom Event. Call your trigger, include the occasion name, and also save everything.
These can come in handy before the conversion or perhaps after the conversion. For example, we have a customer who, after their visitors downloaded and install the white paper, were offered the option to download and install you could look here various other PDFs. We intended to track this to see what visitors' passions are, so we can supply something different at another time.
Not known Details About Google Tag Manager Configuration
To obtain begun, you'll want to create a few user-defined variables. Go to the Variables area in Google Tag Manager, as well as click to develop a brand-new User-Defined Variable.
They go to the Pricing Page, read some info, and also after that close the tab. In Google Analytics, the moment on the Pricing Web page isn't counted. GA tracks the time on site between 2 hits, not the amount of time invested in two pages. That's where Trigger Timers involve the rescue.
Establish a period in the area, and also bear in mind that 30 secs equals 30,000 milliseconds. Restriction the trigger to fire only once. Have it activate on all pages as well as for all timers. Now that that Timer Trigger is produced, you'll wish to develop a tag to press this occasion to GA.
Some Known Questions About Google Tag Manager Configuration.
You'll pick the trigger that we just developed, save, examination and publish. Pick the trigger that's going to discharge your timer tag. Not all tags are created equal, and also you might want certain tags to fire prior check these guys out to others. If you have a specific order for which you desire your tags to fire, Tag Sequencing will certainly enable you to specify if you want the tag to fire prior to or after an additional tag.
To leave out internal website traffic, produce a variable and also name it IP Address. Choose Information Layer Variable as the Variable kind. To start leaving out IP addresses, you'll utilize Data Layer Variable. Call the Data Layer Variable and save. Call your variable. Next, you'll produce the trigger to terminate this. You'll choose Personalized Event as the Trigger kind, add a name for the event, and also select for the trigger to fire on some custom occasions.